
 AstroNotes is migrating to a new format. Please bear with us as we complete this upgrade.
Hopefully the place will be fixed up by mid-May 2024.
AstroNotes is migrating to a new format. Please bear with us as we complete this upgrade.
Hopefully the place will be fixed up by mid-May 2024.
I made two attempts to catch dwarf planet (136472) Makemake in March. The first, in early March, was not so good, mostly the result of operator error and high thin clouds rolling across the field of view during the imaging run. During early spring here in central Oklahoma a night without clouds, high wind, and Moon is hard to come by so I wasn’t able to try again until March 27th with just two out of the three (no wind or clouds). I got better results this time out. The animations below capture just under three hours of Makemake’s movement. Image details are in the endnotes.
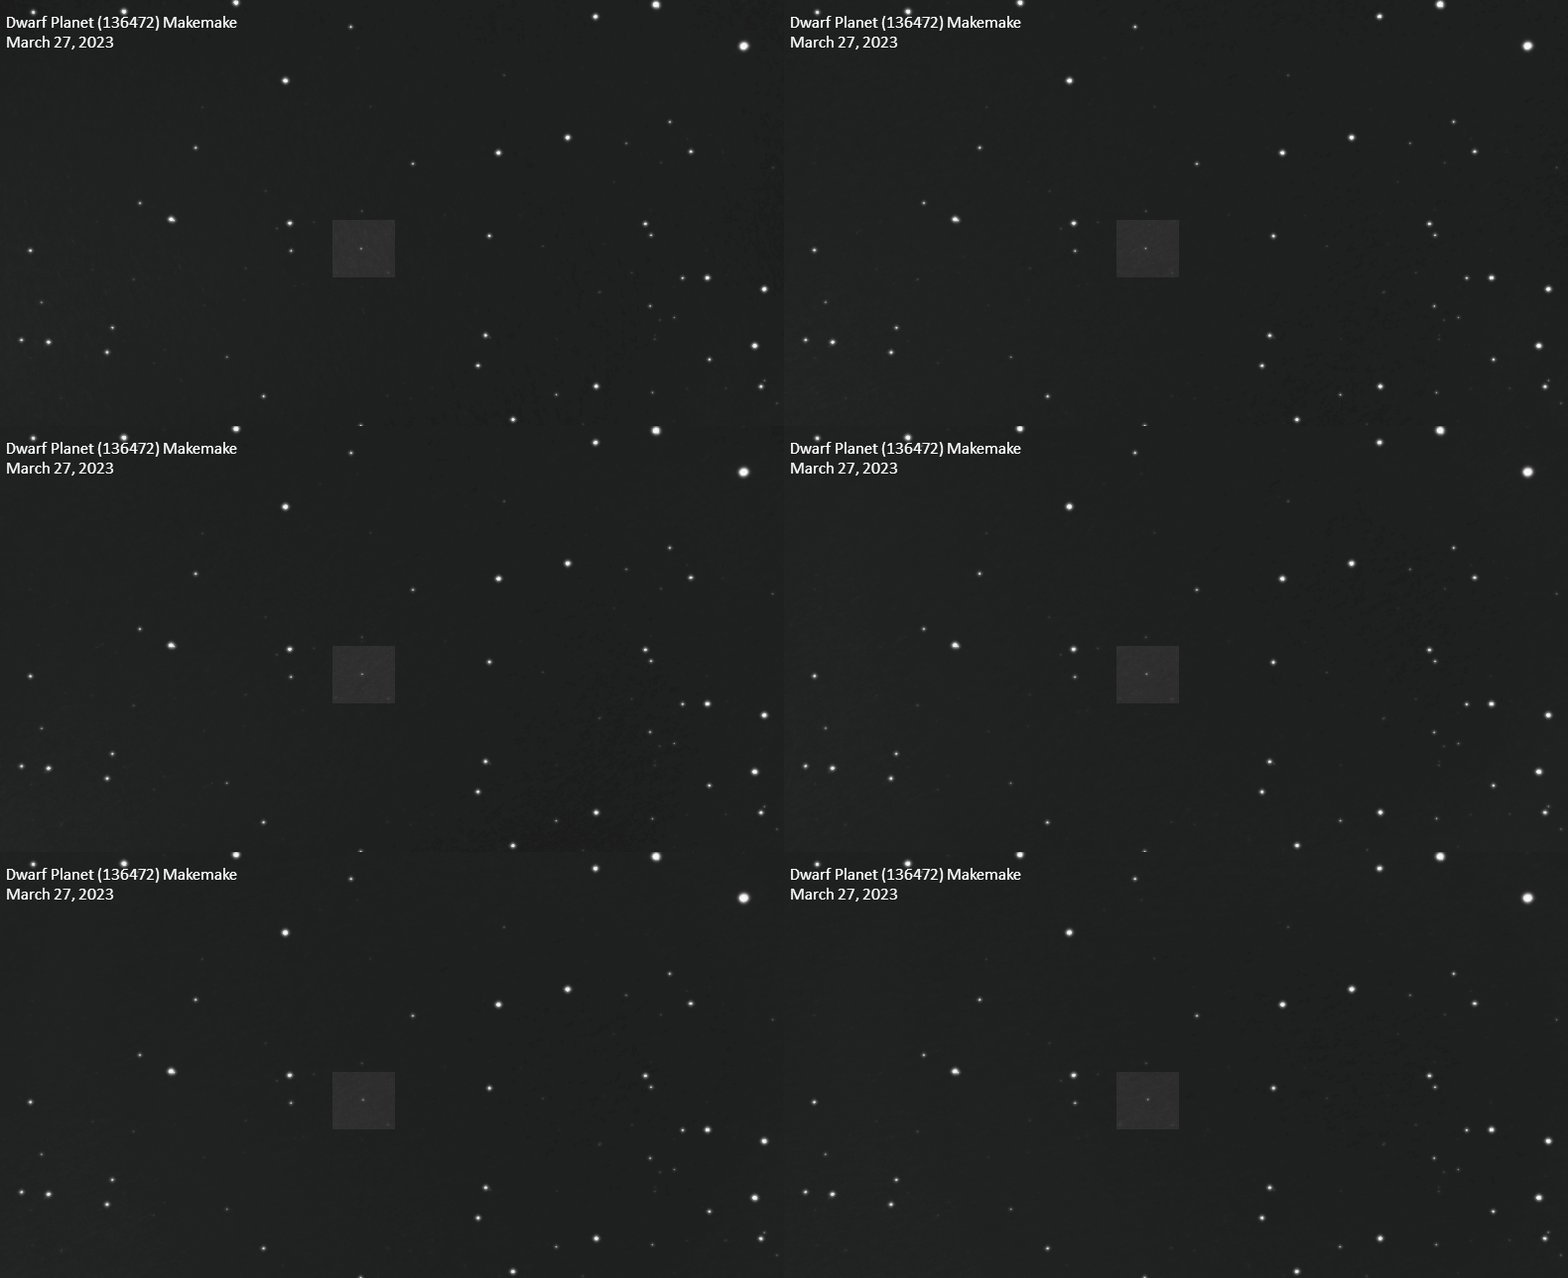
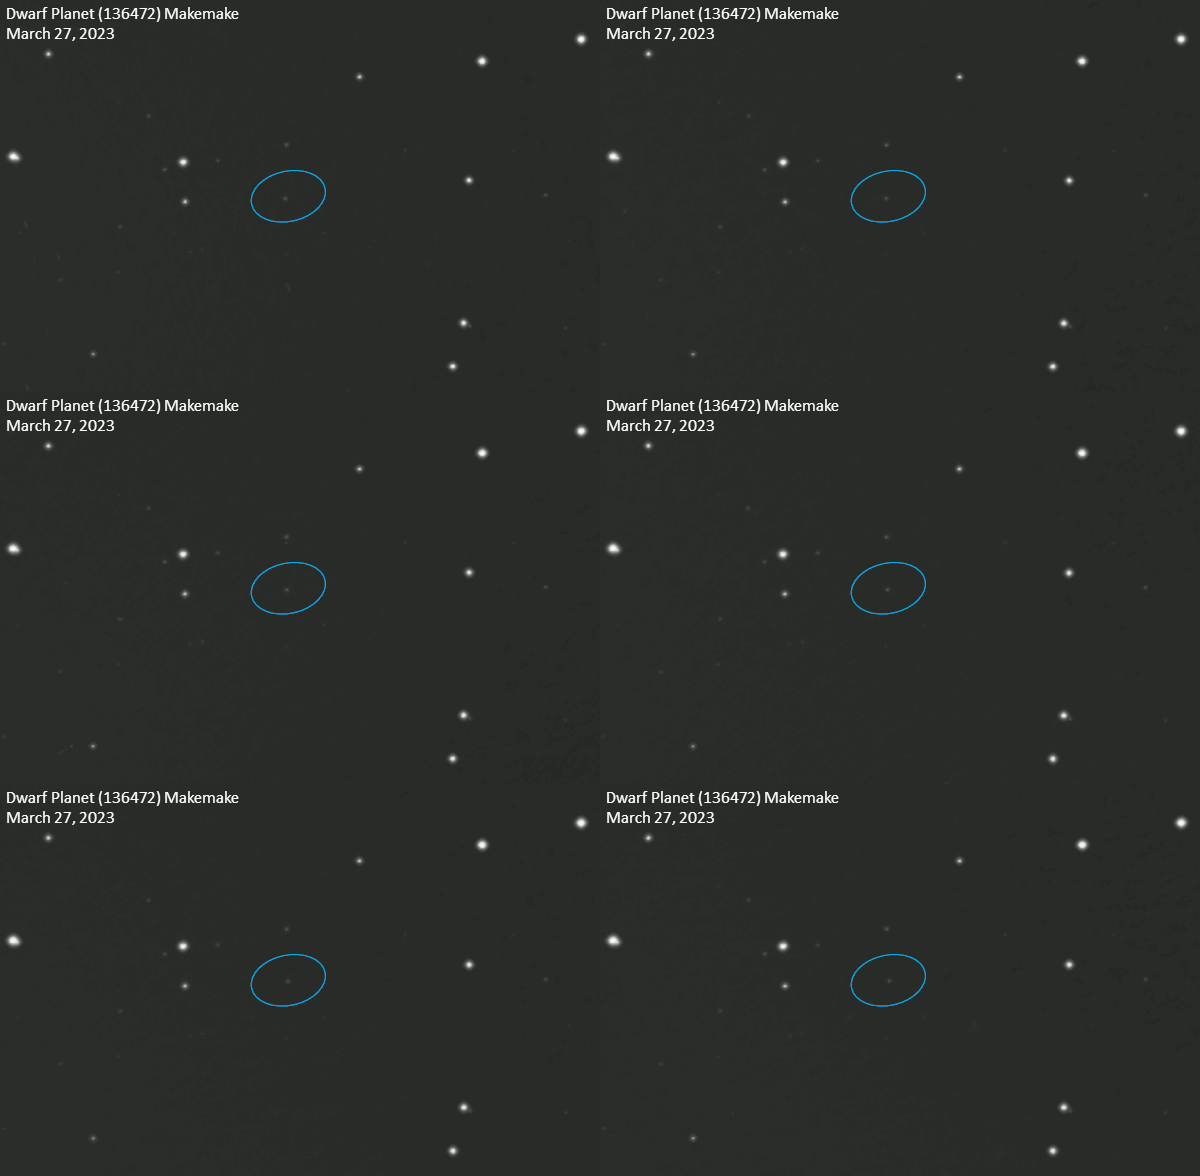
On this night Makemake was in the constellation Coma Berenices moving at a snail’s pace of 0.042 arcseconds/minute. At this rate, over the course of the entire 2.75 hour imaging session, Makemake showed just under 7 arcseconds of movement.
The seeing and transparency during the session were pretty good. But, as usual, my backyard was awash in stray light from neighbors’ homes, nearby unshielded street lights, and a setting crescent Moon. And, as usual, I was looking out of my light-polluted Edmond location directly into the Oklahoma City light dome to the south. Under these conditions, I was half expecting not to be able to detect this faint object at all. But, after slewing the telescope to Makemake’s coordinates, and verifying that I was centered on the correct field, I was relieved to see Makemake’s dim pinpoint appear when the first image started building on the computer screen.
Imaging Considerations
Makemake’s slow sky motion was an important planning factor for this session. Makemake’s extreme distance from the Sun is the reason for its slow sky movement. Makemake orbits the Sun in the outer region of the Solar System known as the Kuiper Belt, a region inhabited by small icy bodies. Makemake’s average distance from the Sun is 4,253,000,000 miles (6,847,000,000 kilometers). This is nearly half a billion miles beyond Pluto. At this distance, it takes Makemake 305 Earth years to complete one orbit around the Sun. No wonder, as seen from Earth, Makemake is such a slow mover.
Because of its slow movement against the background stars, I had to plan to image Makemake for just under three hours to capture noticeable movement. Fortunately, at the time of this imaging session, Makemake’s sky motion was not at its slowest and I could plan on capturing its movement in a single-night session.
Many astro-imagers capture images of Makemeke on successive nights to show its movement against the background of stationary stars. This method avoids the tedious process of capturing hours-long image sequences on a single night, but produces a blinking depiction of Makemake’s movement rather than a smooth continuous movement. I prefer smooth continuous movement so I opted for the single-session approach, even though it shows less total movement.
| Sky Motion: (136472) Makemake v. (2612) Kathryn | ||||
| Object | Minimum (arcsec/min) |
Maximum (arcsec/min) |
Minimum (arcsec/hour) |
Maximum (arcsec/hour) |
| (136472) Makemake | 0.02 | 0.05 | 1.2 | 3.0 |
| (2612) Kathryn | 0.08 | 1.09 | 4.8 | 65.4 |
This table shows how much Makemake’s sky motion varies and how Makemake’s sky motion compares to asteroid (2612) Kathryn, a Main Belt asteroid orbiting the Sun billions of miles/kilometers closer in than Makemake. As this table shows, even at its fastest, Makemake only squeaks out a miniscule 3 areseconds per hour.
Another consideration in imaging Makemake is the fact that it is very faint for the relatively small 8-inch/203 mm telescope that I use. Because of its distance and relatively small size (diameter 900 miles/1500 km), Makemake is very faint as seen from Earth. For the date of this session, the Minor Planet Center predicted Makemake’s V magnitude as 17.10. I measured its magnitude on the first, middle, and last images of this animation sequence and obtained an average magnitude of 17.25, a bit fainter than predicted. At magnitude 17.25, Makemake is almost 5,000 times fainter than the faintest star a dark-adapted human eye can see from an very dark location.

Polar Alignment Test
On a more technical note, this session was a trial run of using the freeware program NINA (Nighttime Imaging ‘N’ Astronomy) tool for polar aligning my Celestron CGEM mount during initial setup. Previously, I had been using Celestron’s All-Star Polar Alignment procedure (ASPA), a feature that allows a user to choose any bright star to polar align the telescope mount, not just one near the North Celestial Pole (NCP).
Like Celestron’s ASPA, NINA’s polar alignment routine does not require use of a star near the NCP. But, unlike ASPA, NINA does not require pointing at a specific star. For NINA, all that is necessary is to point the telescope at any star field anywhere in the sky with enough open sky for NINA to rotate the mount approximately 30 degrees on its right ascension/polar axis. The ability to polar align without being able to see the northern sky is important to me because the view of Polaris and the north circumpolar region is mostly blocked from my backyard by tall trees. The ability to polar align using any random patch of sky, not a specific star, was icing on the cake.
I won’t get into the details of NINA’s polar alignment process, but will say, that it was easier to use than Celestron’s ASPA because it did not require aligning the mount to the sky first, then slewing to and polar aligning on a specific star, and then performing another star alignment with a properly polar-aligned mount. NINA’s procedure allowed me to polar align first on a random patch of sky and then align the mount to the sky using Celestron’s automated StarSense alignment system. This arrangement, with the mount polar aligned first, saved much time in the star alignment process. Details on using NINA’s polar alignment tool can be found here.
In general, the results of NINA’s polar alignment function were pleasantly surprising. I found the tool quite easy to use, and fast. Probably the easiest and fastest method I’ve ever used for polar alignment. Far superior to the painful and time consuming drift alignment method, and easier and faster than SharpCap Pro and Polemaster.
The accuracy of NINA’s polar alignment also seemed quite good, although determining the accuracy is a bit of a trick. I stopped the alignment process when the NINA display showed I was aligned to within 37 arcseconds of the NCP. On this Celestron CGEM mount, stickiness of the azimuth and altitude knobs makes further refinements in polar alignment a time-consuming and often fruitless exercise. This remaining amount of polar alignment error is plenty good enough, and can be easily compensated for by the guiding software, PHD2 and my 50 mm SVBONY guidescope. Indeed, on this evening, my guiding error, as measured by PHD2, bounced around between 0.70-0.80 arcseconds, a very comfortable margin, well inside the 1.02 arcsecond/pixel scale of my telescope-camera system.


From these results, measured by three independent methods, it’s hard to say just how precisely my mount was polar aligned. At best, it was within 37 arcseconds of the north celestial pole. At worst, it was within 2.4 arcminutes (144 arcseconds). But, even at its worst, this single instance is an improvement over what I was getting using the Celestron ASPA process. Polar aligning with Celestron’s ASPA procedure and measuring the error with Celestron’s CPWI and PHD2 showed that I was typically getting between 2.5-5.0 arcminute polar alignment error. Only more experience and data points will tell if NINA consistently provides better polar alignment. I will continue to gather more data.
Conclusion
Overall, this was a productive imaging session. I am now confident that my rig can detect 17th magnitude point source objects from my light-polluted Bortle 7 backyard. I’m looking forward to pushing the limits further by imaging dwarf planet Haumea, a slightly fainter Kuiper Belt neighbor of Makemake. I am also pleased with NINA’s polar alignment tool. So much so, that even if its precision is no better than Celestron’s All-Star Polar Alignment process, I will continue using it for its ease of use and considerable time savings in setting up for an imaging session.
Image Details:
1. Date/Time: March 27, 2023 04:29:02-07:12:33 UT
Location: Edmond, Oklahoma USA
Seeing: Fair-Good; Transparency: Poor; Sky Brightness: Bortle 7
2.75-hour time lapse animation.
9 images, each a stack of 20 @ 60 seconds (total 1200 sec per image). Gain 250.
Orientation: North up. East left. Up is 1.4 degrees E of N
FOV: 28.6 x 15.6 arcmin
FOV Center: 13h 17m 43.931s +22° 25′ 18.387″
Telescope: Celestron C8 (203mm SCT f/10) operating at f/5.8 (Celestron f/6.3 Focal Reducer/Flattener + 128.5 mm spacers)
Camera: ZWO ASI482MC
Capture: SharpCap Pro
Guiding: PhD2
Processing: Deep Sky Stacker, GIMP
Photometry: Astrometrica
2. Same as above except:
FOV: 15.3 x 9.99 arcmin (cropped/resized animation)
FOV Center: 13h 17m 47.309s +22° 24′ 05.224″
I just recently got around to finishing up processing a batch of images of Pluto that I captured on August 3rd. At the time of the imaging session, Pluto was just two weeks past opposition, with opposition having occurred on July 20th.
On August 3rd, Pluto was moving slowly against the starry background at 3.5 arcseconds per hour. Pluto’s apparent movement on that night was slow in comparison to other minor bodies in the solar system, but pretty fast in comparison to itself. For example, earlier in this month on October 2nd, Pluto was only moving at 0.5 arcseconds per hour. At this speed it would have taken two successive nights of imaging to show the same amount of movement I captured in just two hours on August 3rd.

Capturing the images for this animation was a bit of a challenge. On August 3rd, Pluto’s V magnitude was predicted to be 15.0 by the Minor Planet Center and Lowell Observatory’s Ephemeris Service (NASA’s Horizons service was an outlier, predicting a somewhat brighter magnitude 14.34).
A magnitude 15 object is a pretty faint target for my 8-inch telescope, especially since I was imaging from a bright, Bortle 7, backyard, looking straight into the washed out Oklahoma City light dome to the south. In any event, I was pleasantly surprised to see that after slewing the telescope to Pluto’s coordinates, the dwarf planet popped up in the field of view, albeit faintly, right where the Lowell Observatory’s Asteroid Finder chart showed it would be. I haven’t done any photometric measurements on these images, but by my eyeball estimation, Pluto looks more like magnitude 15 than 14.
Processing the image sequence into an animation also proved a bit of a challenge. But, ultimately, the challenge taught me a new processing technique. I normally process animations by opening the time-sequenced group of images as a set of layers in the image processing program GIMP. I then manually align the background stars in each layer with a base layer (usually the first in the time sequence) and export the entire aligned sequence as an animated GIF.
In this case, however, for some reason, I could not manually align the layers. There was always a stubborn half a pixel difference between layers that I could not wring out. This tiny misalignment of background stars between layers caused the stars in the animation to appear to bounce around. After posting the animation on the Cloudy Nights Forum, I received some helpful comments and suggestions that led me to a solution, a solution that made the animation process easier and produced a much better alignment of the background stars.
The solution was using a program called DeepSkyStacker (DSS). I already had DSS, and had some familiarity with using it. The trick was to load the time-sequenced images into DSS and let it produce a sequence of registered (star-aligned) images, but not have it take the final step of stacking the images into a single image. Instead of having DSS create a single stacked image, I opened the registered sequence of images it produced as layers in GIMP, added some stretch and red circle highlights to each layer, and then exported the layered image as an animated GIF. The result: near rock-steady background stars with the only discernable motion being Pluto itself and the natural twinkling appearance of the background stars.
But, there’s more. DSS also calibrated each image so the background, star brightness, and color levels of each image were more uniform. I usually do this manually in GIMP, but for some reason, this was also a vexing problem with this group of images. Thanks to DSS, when I moved the sequence to GIMP, I only had to apply a simple stretch to each layer to bring the background and foreground levels to an eye-pleasing state. And finally, there was another bonus, DSS is freeware.
This project challenged my image capture and processing skills. But, it showed that my modest 8-inch telescope and camera could capture a magnitude 15 target even under heavily light polluted conditions. And, it also taught me a faster, easier method for producing animations of the smaller members of our solar system. Thanks to this project, I’m looking forward to finding and capturing smaller and fainter objects.
Image Details:
August 3, 2022 04:31:02-06:31:13 UT
Two hour time-lapse animation.
North is up. East is left.
FOV: 16.9×12.1 arcmin Original scale: 1.49 arcsec/pixel
Seeing: Good
12 image animation sequence. Each image is stack of 10 frames at 30 seconds, gain 200.
Captured with SharpCap
Processed with DeepSkyStacker & GIMP
Telescope: Celestron C8 (203mm SCT f/10) + Celestron 0.63 focal reducer/flattener (f/6.3)
Camera: ZWO ASI482MC
Mount: Celestron CGEM
Vmag (MPC): 15.0
Motion (MPC): 3.5″/hr toward 256 degrees